...of our retreat in Temecula. Peace and tranquility were all around our campus, thus setting the stage for productive work.
Here, Karon Cornell shows her geisha piece for her daughters birthday.
One of our attendees Marvel,suffered a hairline break in her non painting arm just before departure to the retreat. Marvel delayed having her arm 'cast' set til Monday after the retreat. We offered a couple door prizes too.... Marvel offered one of her handmade purses. I gave away a prepaid subscription to the Quilt Show. com.
Wednesday, May 27, 2009
Tuesday, May 26, 2009
What a fun bunch of people
This retreat will go into the history books as quite a gem. Such fun, hard-working, wonderful people in some of the most beautiful country on earth. We were treated to incredible dining at our retreat center. On Sunday night, the group goes out and about to dine and thus we did. Do they all look happy? Click on any photo for larger image view.
The work done here was spectacular.... I'll show some details over the next few days....
I can't wait to see the finished sunflowers by Janmarie Halliday. This piece is inspired by Janmaries own colorful photograph. WOW!
MAJOR Kudos to both Cindy and Larry Tinsley who tackled their first portrait ever. This one done by Cindy is of their beloved grandaughter.It's scary doing a portrait when you haven't tackled one before and I'm thrilled Cindy stuck with it as her result is wonderful. I'll show you Doc Larry's version in a subsequent posting. Way Cool!
Sunday, May 24, 2009
Goin To the DOG
How fun is this! We're (my class and I) are livin' the good life in the Temecula Wine / Horse Country.. painting our little hearts out. Jackie Sylvester has a grand doggie "Gertie" she wanted to portray in textile. So from photo to cloth... a fabric portrait shown in-progress in the middle. Low and behold....shown in the top photo, the real deal "Gertie" just dropped by to bark hello ! Such fun.
Thursday, May 21, 2009
Heading Out for 4 day retreat
This should be wonderful. Each Spring I put on a 4 day retreat at beautiful Vina Lestonnac in Southern California's wine/horse country of Temecula, Ca. 17 students and I will have 4 days of drawing for those that don't draw, painting on fabric, and for the first time this year, a segment for Quilting Art. All too wonderful this stealing away to a beautiful, peaceful retreat center that loves hosting groups like this. Check out the classroom space with a private kitchen, sleeping and dining space all on campus.
Pool and jacuzzi, massages available
Nice lodging too!
and then there is excellant dining.... all on the same beautiful campus. I am soooo looking forward to this long weekend. 2010 Retreat dates are posted on the Patt's Retreats link shown above left. I'm thinking about adding some surface design. Let me know if that interests you.
Tuesday, May 19, 2009
Quilting Art 101
What a fun day last weekend. Several students attended our first Quilting Art class. Students brought finished tops, learned quilt line 'design principles', made a quilt plan for their 'top', and got to quilting. The one request.... make it 2 days.... we'd all love more time to quilt, huh? MANY THANKS to my students!!!! We'll definitely offer this again. Here's a few student pics..
Patty Seabold....First, Patty planned her quilt lines with colored pencils atop tracing paper laying over her quilt top. I "think" Patty was having fun! :-)
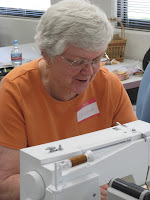
Time to load up the machine with choice of thread. Carolyn Lombard (great name) ready to quilt her painted foul.
Okay... it sure looks like everyone was having fun. It's a big part of class... relax... have fun. The serious.. well maybe not so serious goal of the day.... To eliminate that fear of beginning the quilting. Everyone did well.
HAPPY QUILTING!!!
Sunday, May 17, 2009
Quilting A Dragon
I've been traveling and teaching lately.... not as much new stuff as I'd like.... but thought I might respond here to a student question about how I quilted the wings of a dragonfly (one of my class drawing options). First.... I googled ( maybe yahoo'd...) dragonfly images til I found a good image of a dragonfly that had clear wings so I could really see the vein pattern in at least one type of dragonfly.
Then I used a light marking pencil to mark off major sections on a wing. Click on photo/s for detail view.
Next step... I SLOWLY stitched the major section parameters.
Still slowly continued stitching.. some areas were parallel echoed rows with careful opposite direction stitching to create a cellular structure. This called for small areas of stitching atop previously done parallel rows allowing cells to be varied. The remaining area was mostly triangular stitch meandering. When the entire wing was done you'll notice the lime green stitching right next to the body was pretty bright and distracting.
This is when ink comes back into play where the thread directly adjacent to the main body was stained darker with ink so the wings sunk back into the body. I often ink atop areas of thread already stitched.
Hope this is helpful... :-)
Sunday, May 10, 2009
22 Artists at Work in Fallbrook
WOW! What a fun group of artists with diverse interests. Yesterday we ("that is students") painted tigers, lions, florals, santa, a pet dog, a wolf, a ballerina, dragonflies, and likely something else I can't presently recall(Brain is fried)! The Fallbrook, Ca. guild invited me to teach their May workshop and I do think everyone had a great time. I wish I had more time to spend with each student, but I gotta say... they ALL did well... quite well in fact. Time to do a happy dance!!! I hope to return at some future date. Special thanks to Program Chair Elvia Dawson (pictured directly above text) for her INCREDIBLE coordination of this workshop. Happy painting and quilting! Grins, Patt
Friday, May 8, 2009
Fun in Fallbrook
What a fun friendly guild in Fallbrook, California. Thank you Elvia Dawson for bringing me to your guild. What great lady! I was there last night, with a full workshop plan for tomorrow Saturday. I see lots of guilds in my travels, and am often thrilled with unique things individual guilds take on. This guild just awarded not 1 but 2 $500 education scholarships to 2 deserving high school seniors. Way to go Fallbrook! Say Cheese all! Click on pics for an enlarged view!
Sunday, May 3, 2009
Economic / Efficient Thread Storage
This is likely NOT new news to most of you but I so appreciate this method of thread storage, I wanted to post something on it. We probably all have a ton of thread, and maybe even a high end thread cabinet or two. While I have a commercial cabinet with one manufacturers entire line of thread colors in it (Superior Thread!!!), I equally love this space and cost efficient method. This simple method utilizes one of those inexpensive (put it together yourself) 2 hole storage units that cost somewhere around $20. The units come more than one finish, tho I have chosen white melmaline. The units stand something like 24 inches high so easily fits UNDER a work table. What you see holding my thread in this first picture is 12 ( 6 per storage well) plastic hinged lid containers found in office supply stores, and designed as PROJECT PORTFOLIOS for business projects. That's a lot of thread in a very small space.
Each project box measures about 1 3/4" deep, by 12" x 10 1/2", and holds as many as 45 large spools as exampled in this next picture.
Finally, each project box is sorted with same genre threads.. eg. all solids in one, all metallics in another, etc, and dynolabeled on the outside edge. It's easy to find the right thread quickly with this labeling, AND one can easily take an entire box with you to class if need be. No big deal! It took me a while to collect enough of these as the office supply stores had only 2 or 3 each visit, but it was well worth the effort. Happy quilting, storing!!
Subscribe to:
Posts (Atom)