Wednesday, January 9, 2013

Blue Sky.. Smilin' at me!!!

Who sang that song anyway??  I admit as I begin this... I know I wasn't thinking about quilting when I decided to paint a floating in the air set of words. Quilting around and seemingly 'behind' letters will have lots of starts and stops... but dang.... it seems the right thing to suggest so we'll do it.   Quilting air is to me much like quilting the flow of water.... I like slow slightly irregular echoed curves. How to start..?   I usually will draw ONE beginning line with a marking pencil.  In this case with a FRIXION pen which looks a little like I drew with a ball point but I will iron the line later and IT WILL disappear completely.

Look at the darker drawn quilt line just below the M and almost equidistant between the bottom of letters and  the nose of the ship. ( Click on photos for closeup).  Ironing out will come.
Once the first line is stitched... the next line plays off the first... the third off the second, and so on occasionally introducing new variations as I go.  A good while at this and the blue sky is done.
There ARE some large areas of white/near white clouds. Something will need be done where larger open spaces exist.

Tuesday, January 8, 2013

Lovin' the Lettering

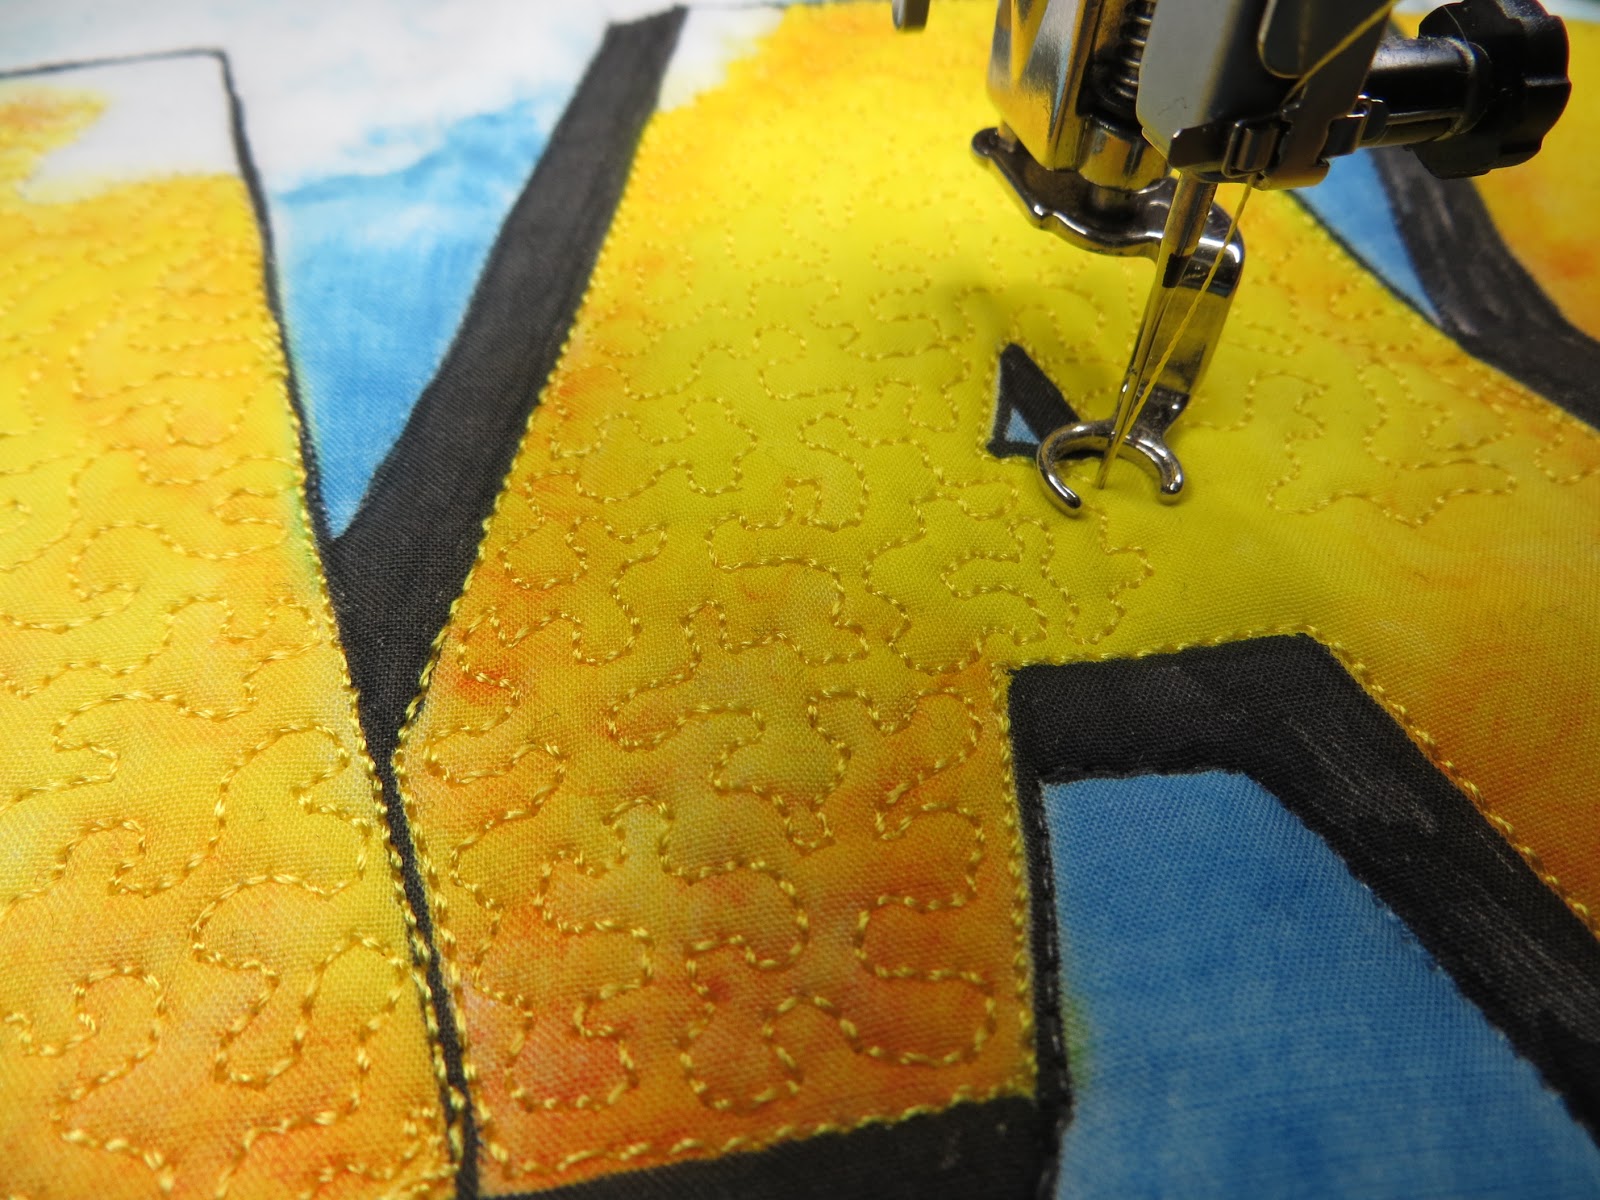
I begin in the middle of the quilt.. The word PANAMA. I'm using a 30wt Sulky thread with monofilament in the bobbin... 0 top tension thread pull.   The goal here is to just get the letters quilted without creating a distracting quilting pattern within the letters. A small meander works just fine for me.
I begin each letter by outlining a straight stitch on the perimeter... then meandering within.  

You may note I have a subtle rust laid over yellow at the outer edges of each letter. In days gone by, I might have changed threads for that area, but I have come to learn it's neither necessary or even helpful as a thread color change would draw attention to the quilting in the darker value areas.

I think you can still adequately detect the value changes made in the ink work.  It looks fine to me. As soon as the whole word is quilted ...we'll begin on the sky, the most time consuming of all.

Sunday, January 6, 2013

Quilting For Road

Seems a good time to get this going.  I long ago painted the piece seen in the previous post.... but I would like to get it quilted before the 2013 show which begins the 24th of this month.  While I seldom put borders on art pieces... this piece seems to beg for one as it has a postcard-like feel. In this case I am playing up the colors of the enormous cruise ship.  Just a quarter inch segment of red amidst a black border will work for me. It's all pinned ( I still like to pin my quilts) and ready to go.
This may seem odd, but the very first thing I do on most of my quilts is use invisible monofilament to secure major areas so I can immediately eliminate the pins and feel free to quilt.   Since I also use monofilament in the bobbin, I set my top tension as low as I can... on my Bernina... a ZERO.  That's usually just right for this effort.  It's hard to thread monofilament ( at least to see it) and I use as small a needle as possible.. eg. a 60 sharp or max 70 sharp microtex.  It's much easier to match up the tiny needle hole with the tip of the thread if white is in the background. In this case, there are white clouds in the quilt top sky so I'm using those to see... but otherwise, I use the white back of a business card and hold it behind the needle as I thread it.  Click on photos for a closer view.


I approach this securing much as I do quilting.  I start generally in the center of the quilt top and work my way outward, upward, downward.  I don't go around EVERYTHING... but I do enough that I know the quilt top and back will stay in place when I move to the quilting segment.  You can see I  follow the piecing idea of stitching in the ditch though there is no real ditch here.  I generally TRY to stitch right where one color/value meets another. Out comes the pins as I go...
I'll begin again on the next post with quilting from the middle outward.

Friday, January 4, 2013

April 2014.. Take The ROAD to PANAMA

 If only Bing Crosby and Bob Hope were alive to see this. They'd love it... especially Bob Hope.   The ROAD To California Quilt Show has collaborated with World of Quilts Travel for a "ROAD" trip through the Panama Canal including  South , Central, and North American ports. Lots of class dates and teachers to boot... me included!  Click on Flyer for an enlarged view. I am teaching a whole bunch of different classes as are other teachers.  Look who is coming!!!
Click Here ... to go to http://www.worldofquiltstravel.com/roadcruise/htm for more details about registration, costs, cabin choices, etc. 

Thursday, January 3, 2013

Route 66 Exhibit at Road To California Jan 24-27 2013

I spent New Years Day and yesterday getting individual pics posted of Artist Quilts for the traveling Route 66 Exhibition... It is undoubtedly the longest blog post ever submitted with pics of over 50 quilts and related exhibition panels.  It's almost all pics... no wordy stuff from me so you might like to take at look at the Route 66 Blog. Click here to get to http://www.route66quilts.blogspot.com.
Hope to see you at Road in a few short weeks. I'll be there all week with the exhibit.

Tuesday, January 1, 2013

Victoria Moreno gets it done!!!!

Last September, I had the good fortune to teach a Painted Quilt Art Class in Sutter Creek, Ca. One of the students was this beautiful in every way young lady "Victoria."  Victoria( Tori)  is very connectd with family, education, personal growth and creativity.  WOW!  I know she ballets, shoots targets, runs, sews clothing as well as makes quilts.  Mom Lori was kind enough to send a pic of Victoria's finished wall quilt she made for her ballet teacher.
Congratulations Victoria. I look forward to our upcoming class THIS year!  .

HAPPY NEW YEAR!!!!!

Here we go in a brand new show.  Happy 2013!!!