Thursday, April 7, 2016

Winter Wonderland...It's About Time

Alright....  I started this project in 2010 when everyone I knew of was already doing or had done this Crabapple Hill pattern(#408)  in Red and White. I chose blues to keep the feel of a cold winter.  I embroidered on cruise ships, trains and planes as I toured the Baltic. The top has been together for a couple years but finally... time to quilt. When one travels and teaches something different than this fun at-home stuff.... it takes time to get to the machine for finishing...    But I am doing it this week for some peace of mind.  'On the longarm and here we go.
I chose a lofty batting to emphasize the snow and boy is it working. I like it but also know I could have been happy with a slightly lower loft. There are  a bunch of varied sized stars in the wide border. They add fun and challenges on quilting.This quilt will take a couple more days .  

Once I've got one more of my backlogged pieces quilted.... I will start taking in quilting for hire. I guess that's an announcement of sorts.  

Monday, April 4, 2016

FACING an Art Quilt

The quilt is quilted, blocked flat, and ready for the finishing edge... a Facing.
Step ONE .... measure and mark the to-be-finished edge.... (see black frixion marker line below)
 Step TWO .... atop the marked line..... stitch the quilts perimeter with a fairly small straight stitch. I have loosened the pressure foot pressure (it's a quarter-inch pressure foot) so I can  without distortion stitch thru 3 layers with a regular vs. a walking foot.   This step is important not only to define the edge but provide a stay stitch for edge stability, and also to secure threads that may be trimmed later.  You'll see in Step 3.
You see here the importance of measuring and marking before stitching....   This piece was painted and quilted a bit beyond a perfect rectangle shape.

Step THREE: Using a rotary cutter and straight edge... trim excess about  1/16" or slightly less outside the previously step 2 stitched line
Result:
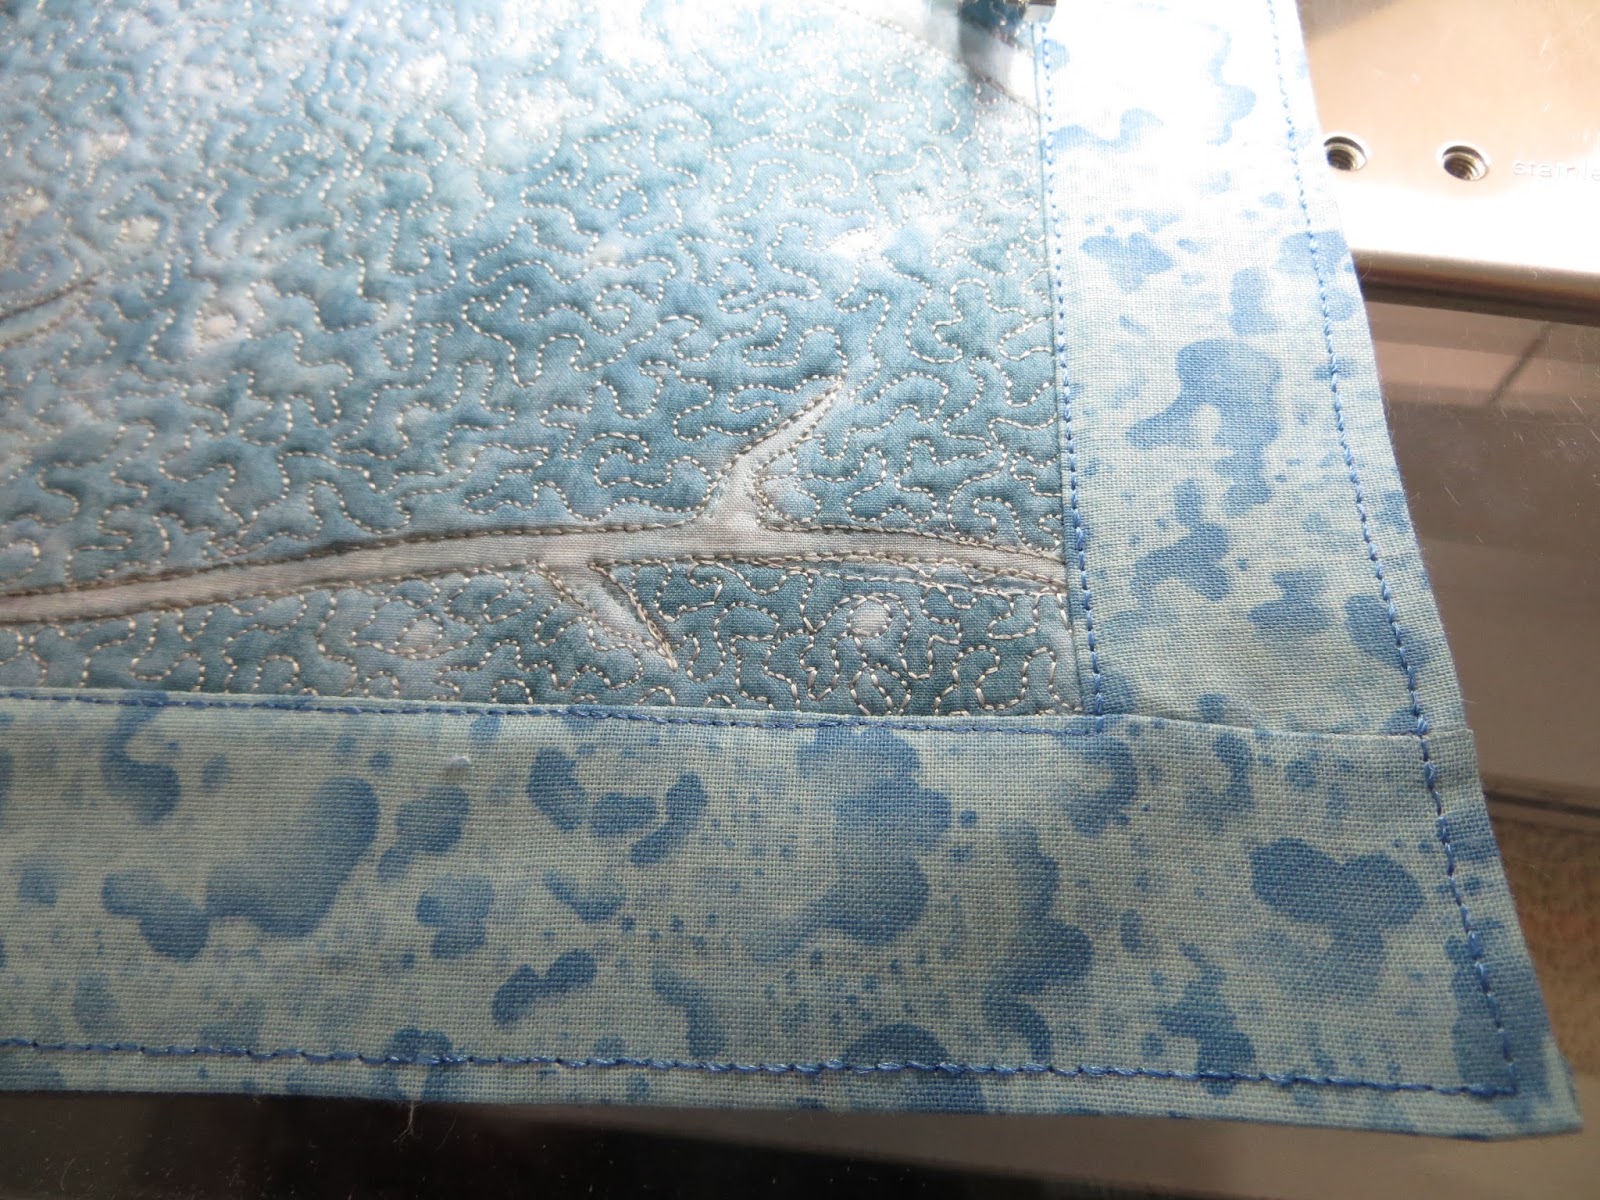
As if you were adding another border sashing , cut and add/stitch 4 strips ( app 1 3/4" wide)  to the quilt trimmed in step 3.. ( I'm using a 1/4 inch  pressure foot below) I've folded back a strip so you can see the  new stitch line is appx. 1/8 inch in  from the trimmed edge stitch line.  This may seem strange but this approach when all done will give us a nice tight knife edge finish.
Step FIVE calls for a good pressing of the new 'sashed border' followed by a straight line stitch no more than 1/16' to the right of the 'ditch.' This is achieved by running the inside edge of the left foot right along the 'ditch.'  Again, hang with me here.... This effort will add even more stability to the eventual faced edge and also be a helpful finishing reference.
Step SIX: Turn and stitch the loose outer edge under. This new stitch edge will ultimately be where a binding stitch finish is done on the back side of the quilt.
Step SEVEN... done at the ironing board...  press two sides to the back. You know you've got it right when from the backside you can see  the Step FIVE stitch line just rolled to the back in a STRAIGHT line.
 Use a binding or applique stitch to hand stitch that portion of the facing that can be stitched to the quilt backing.... i.e.   leave the 'sashing' at each end of the strip free for trimming in the next step.
From the front, this finished step looks like this.. 
Step EIGHT
Trim away most of the extra folding left 'free' in previous step. You'll trim all four corners this way..   ( We just don't need the bulk keeping it would add.)   
Following Step SEVEN approach, iron  the remaining top and bottom to the back... miter the corners, and bind/ applique stitch the edges as done in Step SEVEN.

This is what you've created... looking straight on toward the  quilt edge is a clean tight, stable knife edge finish. Cool, eh?  By the way... use of a thinner  batting makes it  easier to achieve a tightly turned edge.

This is one cold and lonely little cardinal....   


Sunday, April 3, 2016

A Wanted Poster in order!!!

At the time I was painting this, I was yet to learn 'Olivia's name and since I wanted to surprise her Nana.... I went forward thusly.  The lighting on the original photo reminded me of a  police style Mug Shot... so  with the cowgirl hat and mug shot thinking, I tripped to an old West "Wanted" poster idea
The poster designed, pinned and ready to quilt. 
I decided to quilt the plain background with a wood-grain motif. It isn't uncommon for me to draw my first line of quilting... then stitch.

Sure helps getting started ,,, thereafter , it's mostly irregular echo work with the occasional addition of a new "KNOT!"  Variegated thread worked great for this. 
I 'mitered' the quilted wood corners ... and voila. 
Bound and 'sleeved' , then immediately mailed this off to Olivia's Nana ( Barbara Cohen). 
The label mailed later is my rub cloth used to test inks when painting the piece.... I free motion 'wrote' with girly PINK thread. I've been wanting to use rub cloth to make labels for a good while.  The idea may be lost to anyone that doesn't paint on fabric, but it was fun for me to do. 


Saturday, April 2, 2016

Just Gotta Paint Miss Olivia!

 I am always looking for great source of portrait demos for my classes..... My out of state friend has a new granddaughter... Miss Olivia , 9 mos. Grandpa Barry took an adorable photo of her wearing 'Mama's cowgirl hat. So flipping cute. I painted her here for absolute joy... giggling throughout the effort.  First a black and white contour drawing of her placed underneath sheer  white PFD.

Skin tone ink added.  ( Wet here and always scary looking until dried and eyes are in.)
I've added some dry brush contour using a sand colored ink. 

No longer scary... Bright blue eyes, nostrils darkened, big time eyelashes are in... lips added. 
Below: Baby girl blush pink added.... some dry brush white highlights on the chin, tip of nose, under eyes, etc. , jammies added and we're ready for that hat!! There are several things different than norm on this portrait... 1) light source is from below promoting little shadow at the lower chin, 2) white highlites are on the lower half of the pupils, 3) lip edges appear turned down, and 4) the underneath edge of the upper lid is visible and almost pure white.  
Lasting message:Take nothing you think you know for granted-STUDY;-D 
So, the DETAILS of her hat don't help tell the 'story' so I left it mostly out of focus. Pretty darned cute kid.... What fun to paint! Now what to do ???


Sunday, March 6, 2016

Back side view...

 Machine Quilters know one can sometimes better appreciate the overall quilting job from a back side view. So the previous quilt taken off the long arm and laid back side up atop the bars.
 Wow.. I think I used about 3000' of thread (many bobbins) . 
It even surprises me how much is in this piece. 
This might be why I'm behind on my laundry and other chores.  ;-D 
'Will deliver to owner upon return from Asilomar.

Friday, March 4, 2016

Words To Live By

So here's what I've spent much of February doing....   First,  a friends quilt laid atop my  glass table to consider a quilt plan. The pattern is gorgeous... 90 x 90 " Words to Live By."  This quilt deserves some attention. It's an heirloom.  Felted wool  hand appliqué atop cotton.
In my art quilting, I don't mark anything but this will need some repeated flourish in open red and black triangles.


The above markings were  actually done later in the long arm process, But thought I'd  show the known plan here. In long arm quilting, I machine baste the entire quilt . Those half square triangles were just 'ditched' then on to the appliqué blocks. I chose a free motion echoed S curve coupled with scrolls for the individual appliqué blocks in both the center 4 by 4 blocks and surrounding individual word blocks ( A few shown here.. In addition to the center 4 x 4 medallion block there are 12 large individual  blocks ) 


I do love the look of wool atop  light value cotton. It's gorgeous! 
I need to get this off the long arm and trim it up. 


Thursday, March 3, 2016

Heading To Asilomar, Pacific Grove Ca.

It's been one crazy month since the last post.... Lots going on... won't bore you here. Today however, I am packed up for departure to Session II  teaching at 2016 Empty Spools Seminars. This on the  seaside grounds at Asilomar.. ( a.k.a. heaven on earth) in Pacific Grove.  Can't wait to see the sights of this beautiful community.  Here's a  couple pics I shot from last visit.

.. A cool window display in a shop in neighboring Carmel.
As always.... beautiful beach walks right outside our doors.. the shore is within feet of here.


 A look back eastward  from waterside... a gorgeous sunrise as I headed to breakfast before class.