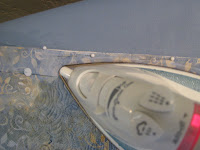
Step One Photo
Begin by cutting 2" or 2 1/2" strips of fabric which ideally match the backing. Using a quarter inch seam, piece these strips onto the quilt as if you are adding a sashing or border on the outside edge. Press 'sashing' fabric outward. You may at this time choose to turn,press, and machine stitch this outer raw edge under a quarter inch.... but it will be turned one way or another as described in step 4 later. :-) Read on!

Step Two Photo ( This is optional, but I find it a great stabilizer to the finished edge). Using a quarter inch foot, straight stitch (about 1/8" from sashing seam) through top of sashing and the 1/4 inch edge of quilt salvage beneath.

Step Three Photo
The most important part of facing is this piece so take your time. This will be done one edge at a time. Complete steps 3 - 6 one edge at a time. First, complete 2 edges on the opposite sides of the quilt, finally the remaining 2 opposite edges. Here goes: Roll the sash facing to the back of the quilt and steam press the edge for a flat clean edge.

Step Four Photo
Turn the raw edge of the facing under, press, and pin. Stop at the outer corners for review in the next step.

Step Five Photo
At corner, trim away excess fabric, press and pin corner as done in previous step.

Step Six Photo
Hand stitch corners and straight edges of facing. I tend to miter-turn the final sides corners though a straight turn is okay too.


No comments:
Post a Comment